Post’s image designed by the author.
Now, after we made our model ready, it is time to build a REST API for it.
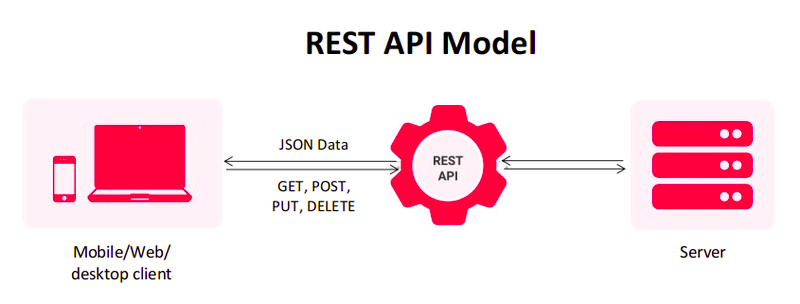
Understanding APIs and REST
An API (Application Programming Interface) acts as a bridge, facilitating communication between different software components through well-defined definitions and protocols. APIs come in various styles, and one of the most prevalent is the REST (Representational State Transfer) style, which we’ll focus on here.
REST is an architectural style for building services with specific constraints and agreements. A RESTful system comprises two key components:
- Client: sends a request.
- Server: replies with a response.
REST architectural constraints
- Uniform interface: this suggests that there should be a uniform way to interact with a server.
- Stateless: it means the server does not store any state about the client session on the server-side and the client includes all information necessary for the server to fulfill the request. Also, the server never relies on information from previous requests from the client. If any such information is important then the client will send that as part of the current request.
- Cacheable: every response should include whether the response is cacheable or not and for how much duration responses can be cached on the client side. The client will return the data from its cache for any subsequent request and there would be no need to send the request again to the server.
- Client-Server: RESTful applications apply the client-server architecture, the client requests the resource, and the server holds the resource. The client and the server can evolve independently.
- Layered system: this means that we can find other servers between the client who sends a request and the server who sends a response. These servers add layers to provide functionality like caching, security, load balancing…etc.
- Code on demand: this one is optional, and it means can send code to be executed by the client. For example, a JavaScript code that the server sends is to be executed on the browser.
REST best practices
- Use the JSON format to send/receive data.
- Use nouns instead of verbs in endpoints.
- Name collections with plural nouns.
- Use status codes in error handling.
- Use nesting on endpoints to show relationships.
- Use filtering, sorting, and pagination to retrieve the data.
- Use SSL for security.
- Apply versioning.
Click here to see examples.
By now, you have an idea about what is API and REST API. Now let’s build a REST API for our machine learning model using Django.
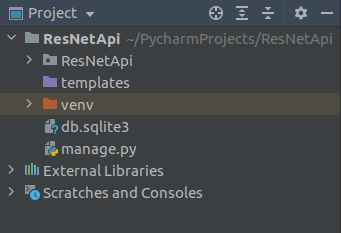
The first thing you need to do is to create a Django project, but I should mention that you need Python installed on your machine, so, install Python and don’t forget about Pycharm also.
Now, open up Pycharm, and create a Django project with a name of your choice, for me, I called it ResNetApi. You will have a structure similar to the following:
Next, add the Python file that contains the model code to the project (for me it is resnet50.py)
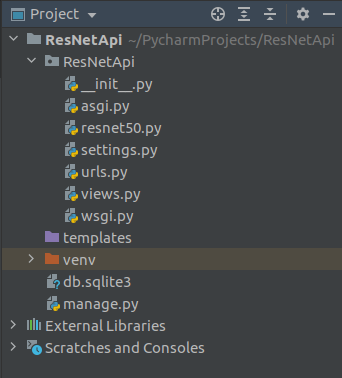
If you have noticed, I have a views.py file and you don’t. This file will contain your views code, create one.
A view is a function that takes an HTTP request and returns an HTTP response, that is all.
For our case, we need a view that takes an HTTP request that contains image data so that we can pass it to our model’s prediction function to make the prediction.
from rest_framework.views import APIView
from rest_framework.response import Response
from PIL import Image
from ResNetApi import resnet50
import base64py
from io import BytesIO

class ImagePredictionAPIView(APIView):
    def post(self, request, format=None):
        # Retrieve the base64-encoded image from the request data
        encoded_image = request.data.get('image')
        if encoded_image:
            # Decode the base64-encoded image
            decoded_image = base64.b64decode(encoded_image.encode())
            # Load the image using PIL
            image = Image.open(BytesIO(decoded_image))
            # Resize the image to (224, 224)
            image = image.resize((224, 224))
            # Perform prediction and get the result
            decoded_prediction, score = resnet50.predict(image)
            # Return the prediction result as a JSON response
            return Response({
                'prediction': decoded_prediction,
                'score': score
            })
        else:
            return Response({'error': 'Could not process the image'}, status=400)
Let me explain the import section for you and why we need to import those libraries.
from rest_framework.views import APIView
from rest_framework.response import Response
from PIL import Image
from ResNetApi import resnet50
import base64
from io import BytesIO
- rest_framework: the Django REST framework, which is a powerful and flexible toolkit for building Web APIs.
- PIL: python imaging library, it provides image processing capabilities.
- resnet50: our model file.
- base64: module used to encode and decode data.
- io: a module for performing file related I/O operations (eg. file reading/writing)
- BytesIO: io module that allows us to manage the file-related input and output operations.
- Image: a module that includes functions to load, open and create images.
- APIView: a subclass of Django’s view that handles incoming requests.
- Response: allows you to return content that can be rendered into multiple content types, depending on the client’s request.
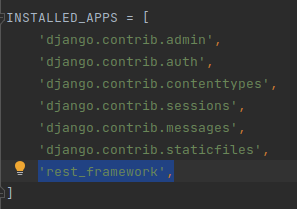
You need to install the above libraries. The IDE will put a red line under the uninstalled libraries telling you that you should install them, click on install and it will take care of that. After installing the necessary libraries, one extra step for the Django REST framework to be configured for the project is to add to the settings. Inside your project’s settings.py file, add 'rest_framework' to INSTALLED_APPS list.
The request holds a base64 string that represents an image, the view accepts a POST request, decodes this base64 string, and uses PIL and BytesIO to load the image. After that, it reshapes the image to finally pass it to the prediction function and returns a response accordingly.
class ImagePredictionAPIView(APIView):
    def post(self, request, format=None):
        # Retrieve the base64-encoded image from the request data
        encoded_image = request.data.get('image')
        if encoded_image:
                    # Decode the base64-encoded image
                    decoded_image = base64.b64decode(encoded_image.encode())
                    # Load the image using PIL
                    image = Image.open(BytesIO(decoded_image))
                    # Resize the image to (224, 224)
                    image = image.resize((224, 224))
                    # Perform prediction and get the result
                    decoded_prediction, score = resnet50.predict(image)
                    # Return the prediction result as a JSON response
                    return Response({
                        'prediction': decoded_prediction,
                        'score': score
                    })
                else:
                    return Response({'error': 'Could not process the image'}, status=400)
Now after we created the view responsible for handling the requests, we must map it to a URL. To achieve that we can use the Django URL dispatcher by creating a URL pattern in the url.py file.
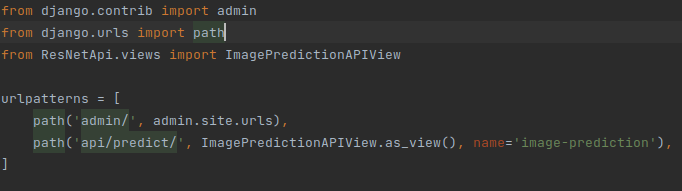
Here, the URL pattern api/predict/ is mapped to the ImagePredictionAPIView view. When a user makes a POST request to api/predict/, DRF (Django Rest Framework) will call the ImagePredictionAPIView view to handle the request and return a response. Mapping URLs to views is called Routing.
In order to test our API, we go to the terminal in the IDE and launch the following command:
python manage.py runserver

If the previous command didn’t work for you, try that:
python manage.py runserver 0.0.0.0:8000
Next, go to your browser and search with the following link: http://127.0.0.1:8000/api/predict/
You will see something like that:

Now, open a new tab, search for a dog image, and copy its link, I took the link to this image. After that, go to this website, choose the remote URL instead of the local file, and convert the image to a base64 string. Copy the generated base64 string and copy it in the Content field of the DRF page.

Click POST and you should see something like the following:

As you can see, the prediction is “Golden_retriever” (a type of dog) with 96.97 as the score.
For the Flutter app, it doesn’t need any explanation, I will just give you the repository link since what it does is just an HTTP request to the back end we made.
GitHub repositories
Conclusion
In this post, we have seen how to build a back end for our machine learning model and tested it locally.
By Younes Belouche on February 11, 2024.